A well-lit pool enhances the ambiance of your outdoor space and ensures safety during nighttime swims. If you’re facing a flickering or burnt-out pool light, fear not! This guide will walk you through pool light replacement in five straightforward steps. Let’s get started!
Step 1: Turn the Power Off
Safety should always be the top priority when working with electrical components. Begin by switching off the power supply to the pool light. Locate your pool’s circuit breaker box and turn off the corresponding breaker. Verifying that the power is completely shut off before proceeding is crucial.
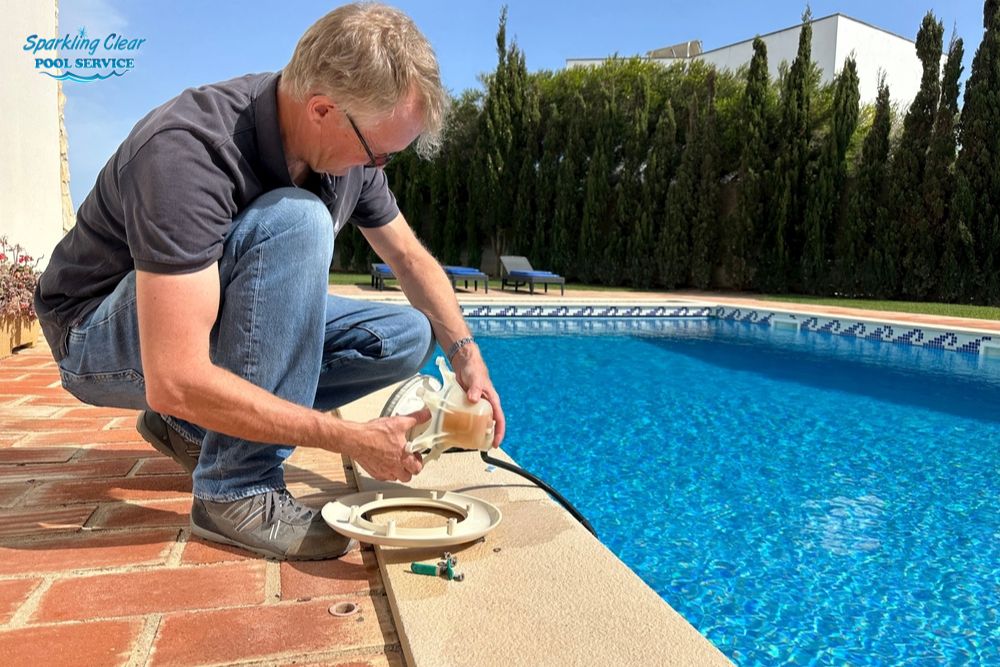
Step 2: Remove the Pool Light Housing
Once you’ve ensured the power is off, it’s time to remove the pool light housing. This is usually located on the side or bottom of the pool. Gently unscrew or unclip the housing cover, carefully not damaging any surrounding fixtures or surfaces. If the housing is sealed with a gasket, carefully poke it open using a flat-head screwdriver.
Step 3: Open the Light Housing
With the housing cover removed, you’ll have access to the inner workings of the pool light. Carefully disconnect the wiring attached to the light fixture. Take note of the placement and connections to make reinstallation easier later. If the wiring is corrupted or damaged, this is also an excellent time to replace it.
Step 4: Replace the Bulb
Once the wiring is detached, you can now remove the old bulb. Pool light bulbs are typically sealed within a protective casing. Unscrew or unclip the case, taking care not to break the glass. Gently remove the old bulb and replace it with a new one of the same type and wattage. Double-check that the new bulb is securely in place before proceeding.
Step 5: Re-install the Housing
Now that the new bulb is in, it’s time to reassemble the pool light. Reconnect the wiring according to the notes you made earlier. Ensure all connections are secure and free from any loose wires. Carefully place the housing cover back, making sure it’s properly aligned and sealed. If necessary, use a new gasket to ensure a watertight seal.
When to Call a Professional
While replacing a pool light can be a manageable DIY task for many, there are instances where it’s best to seek professional assistance. Suppose you’re uncomfortable working with electrical components. In that case, if the wiring appears extensively damaged or if you encounter any unexpected complications during the process, it’s wise to call a certified pool technician. An accredited pool technician ensures your safety and saves the integrity of your pool’s electrical system from compromising.
Trust Sparkling Clear Pools for Professional Pool Care!
Changing a pool light can be a simple DIY task with the proper knowledge and precautions. By following these five easy steps, your pool will shine brightly in no time. Remember, it’s always best to seek professional assistance if you ever feel unsure or encounter unexpected concerns. Enjoy your beautifully illuminated pool!
Trust the professionals at Sparkling Clear Pools for expert pool maintenance and repairs. Our certified technicians dedicate themselves to keeping your pool safe, clean, and beautifully illuminated. Contact us today for all your pool service needs!


